
ഇത് ഒരു ഗ്ലാസ് മാത്രം മതി! എത്ര മുരടിച്ച കറിവേപ്പും ഇനി കാട് പോലെ തഴച്ചു വളരും! കറിവേപ്പില നുള്ളി മടുക്കും!! | Kanjivellam Curry Leaves Fertilizer
Kanjivellam Curry Leaves Fertilizer
Kanjivellam Curry Leaves Fertilizer : കറിവേപ്പില ഒഴിവാക്കി കൊണ്ടുള്ള കറികളും, തോരനുമെല്ലാം ഉണ്ടാക്കുക എന്നത് നമ്മൾ മലയാളികൾക്ക് ചിന്തിക്കാനേ സാധിക്കാത്ത കാര്യമാണ്. അതിനാൽ തന്നെ ഏത് നാട്ടിൽ പോയാലും ചെറുതാണെങ്കിലും ഒരു കറിവേപ്പില തൈ എങ്കിലും കൊണ്ട് നട്ടുപിടിപ്പിക്കുന്നവരായിരിക്കും നമ്മളിൽ മിക്ക ആളുകളും. എന്നാൽ ഇത്തരത്തിൽ നട്ട് പിടിപ്പിച്ചെടുക്കുന്ന കറിവേപ്പില ചെടികളിൽ നിന്നും ആവശ്യത്തിന് ഇലകൾ ലഭിക്കുന്നില്ല എന്ന് പരാതി പറയുന്നവരായിരിക്കും മിക്ക ആളുകൾക്കും.
അത്തരം ആളുകൾക്ക് തീർച്ചയായും ഉപകാരപ്പെടുന്ന കുറച്ച് കറിവേപ്പില ചെടിയുടെ പരിപാലന രീതികളാണ് ഇവിടെ വിശദമാക്കുന്നത്. ആദ്യം തന്നെ കറിവേപ്പില തൈ നടുമ്പോൾ ശ്രദ്ധിക്കേണ്ട പ്രധാന കാര്യം അത്യാവശ്യം നല്ല രീതിയിൽ തയ്യാറാക്കിയെടുത്ത ഒരു പോട്ടിംഗ് മിക്സ് ഉപയോഗപ്പെടുത്തുക എന്നതാണ്. എന്നാൽ മാത്രമാണ് ചെടി പെട്ടെന്ന് തഴച്ച് വളരുകയുള്ളൂ. പോട്ടിങ്ങ് മിക്സ് തയ്യാറാക്കുമ്പോൾ അടുക്കളയിൽ നിന്നും ലഭിക്കുന്ന ജൈവ വേസ്റ്റ് മിക്സ് ചെയ്ത് തയ്യാറാക്കുകയാണെങ്കിൽ കൂടുതൽ ഗുണം ചെയ്യും.
ഇങ്ങനെ ചെയ്യുന്നത് വഴി ഇലകളിൽ ഉണ്ടാകുന്ന പ്രാണി ശല്യവും പോയി കിട്ടുന്നതാണ്. കൂടാതെ നല്ല രീതിയിൽ വായുവും വെളിച്ചവും ലഭിക്കുന്ന സ്ഥലത്താണ് ചെടി ചട്ടി ഇരിക്കുന്നത് എന്ന കാര്യം ഉറപ്പുവരുത്തുക. ചെടിക്ക് വെള്ളം നൽകുമ്പോൾ മഴ പെയ്യുന്ന രീതിയിൽ ഇലകളിലേക്ക് കൂടി എത്തുന്ന രീതിയിലാണ് തളിച്ച് കൊടുക്കേണ്ടത്. പുതിയ ഇലകൾ വന്നു തുടങ്ങുമ്പോൾ ചെടി ഇടയ്ക്കിടയ്ക്ക് പ്രൂണിംഗ് ചെയ്യാനായി പ്രത്യേകം ശ്രദ്ധിക്കണം.
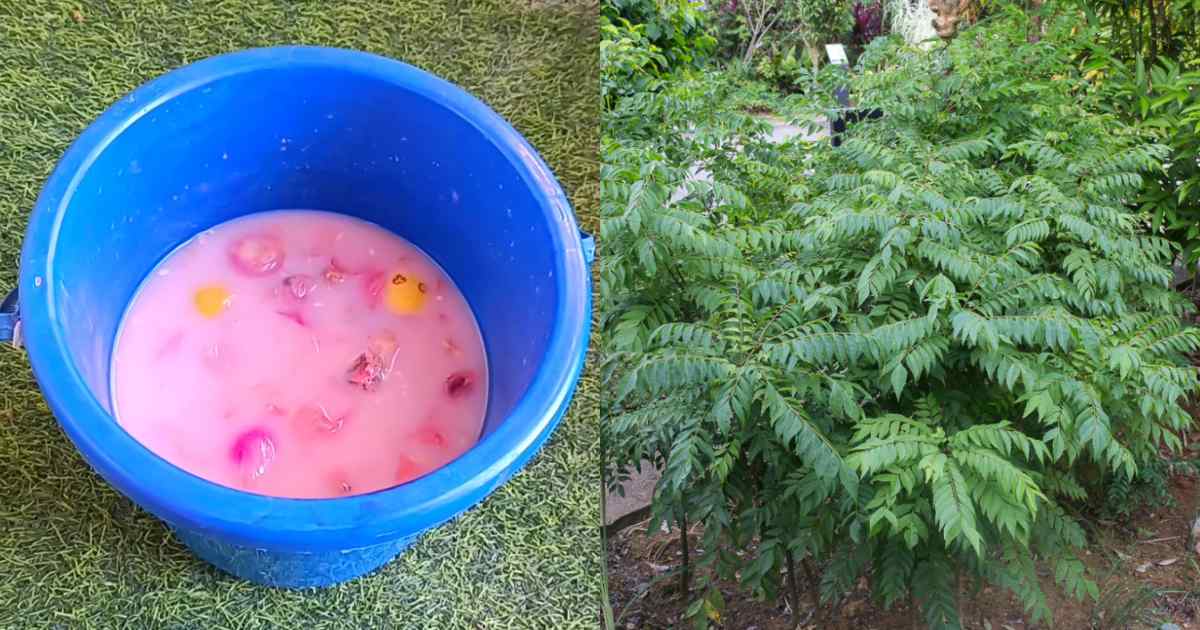
എന്നാൽ തളിരിലകൾ വന്നു തുടങ്ങുമ്പോൾ തന്നെ ഒരു കാരണവശാലും ഇല നുള്ളി എടുക്കാതിരിക്കാൻ പ്രത്യേകം ശ്രദ്ധിക്കുകയും വേണം. കറിവേപ്പില ചെടി തഴച്ചു വളരാനായി വീട്ടിൽ തന്നെ ഒരു വളക്കൂട്ട് തയ്യാറാക്കാവുന്നതാണ്. അതിനായി നല്ല കട്ടിയുള്ള കഞ്ഞി വെള്ളം എടുത്ത് അതിലേക്ക് രണ്ട് നാരങ്ങയുടെ തോടും, ഉള്ളിയുടെ തൊലിയും ഇട്ട് അഞ്ചു ദിവസം പുളിപ്പിക്കാനായി മാറ്റിവയ്ക്കുക. അതിന് ശേഷം നല്ല രീതിയിൽ അരിച്ച് വെള്ളത്തോടൊപ്പം ചേർത്ത് ഡയല്യൂട്ട് ചെയ്ത ശേഷം കറിവേപ്പില ചെടിയിൽ സ്പ്രേ ചെയ്തു കൊടുക്കാവുന്നതാണ്. ഇങ്ങനെ ചെയ്യുന്നത് വഴി ഇലകളിൽ ഉണ്ടാകുന്ന പ്രാണി ശല്യം ഇല്ലാതാക്കുകയും ചെടി നല്ല രീതിയിൽ തഴച്ചു വളരുകയും ചെയ്യുന്നതാണ്. കൂടുതൽ വിശദമായി മനസ്സിലാക്കാൻ വീഡിയോ കാണാവുന്നതാണ്. Kanjivellam Curry Leaves Fertilizer Credit : Jeny’s World
Kanjivellam Curry Leaves Fertilizer
Kanjivellam Curry Leaves Fertilizer is a natural and traditional method used primarily in South India to boost the growth of curry leaf plants. Here’s how you can prepare and use it effectively:
🌿 What Is Kanjivellam?
Kanjivellam is the starchy water left over after cooking rice (also called rice gruel or rice starch water). It’s rich in nutrients like:
- Carbohydrates – provide energy to beneficial soil microbes
- Micronutrients – trace minerals from rice
- Organic matter – improves soil texture and moisture retention
🧪 Nutrient Boost: Adding to Kanjivellam
To turn plain kanjivellam into a fertilizer specifically for curry leaf plants, enrich it with other ingredients:
🥄 Ingredients:
- 1 liter kanjivellam (cooled)
- 1 tablespoon sour curd or buttermilk (natural probiotic)
- 1 tablespoon ground neem cake or mustard cake (optional for pest resistance and extra nutrients)
- A handful of crushed curry leaves or compost (optional for leaf nutrients)
🧑🍳 How to Prepare:
- Collect kanjivellam after cooking rice (avoid salt).
- Let it cool to room temperature.
- Mix in curd or buttermilk to start mild fermentation.
- Add neem cake or mustard cake if using.
- Let this mixture sit overnight (6–12 hours) in a cool, shaded place.
🌱 How to Use:
- Water your curry leaf plant with this mixture once every 10–15 days.
- Pour around the base of the plant, not on the leaves.
- Best used in the early morning or late evening.
⚠️ Tips & Precautions:
- Do not store the fertilizer for more than 1–2 days.
- Avoid overuse—it may cause root rot if soil remains too wet.
- Always check if the plant is well-drained.
- Can be used for other leafy herbs like tulsi or spinach too.